Fun with Tech Art – Pt. 4
In this post, we create a world transition shader for Nanite using sphere masks in Unreal Engine 5


Before we get into this effect, you may wonder why Part 4 is before Part 2, and that's because I can't count. Part 2 is still being written, and I was inspired to do this effect and write-up first.
The effect we're looking at is a world transition between two biomes. It's not an original effect by any stretch of the imagination and was introduced to me by the work of Sakura Rabbit (Twitter). I've left her sizzle reel below because, frankly, it's inspiring and well worth the watch.
Sakura Rabbit's Sizzle Reel for 2022
Now, Sakura works in Unity, so there are a few things we need to be thinking about when working in Unreal. Firstly, Nanite didn't support the masked opaque materials we need for the effect until 5.1, and secondly, attempting to replicate the rotational distortion effect in Sakura's reel causes issues with Lumen's shadows.
Essentially, the shadows behave like the nanite objects are not being transformed, despite the World Position Offset warping them to no end. I found this too visually off and called that effect there.
For the actual effect, we're going to use a sphere mask around a 3D point in world-space. Sphere masks are pretty awesome. They return a blend based on the distance from a 3D coordinate to another 3D coordinate. For our effect here, we're using the distance from the object's world position to the 3D point we've defined in a Material Parameter Collection (MPC). We could specify this point in the shader as a parameter, but we have a few values, and MPCs will drive all instances of the shader without us having to manage them individually. Sequencer also drives Material Parameter Collections directly, which is very convenient.
I don't have anything outside of test scene to demonstrate the effect, so my result doesn't look as good as Sakura's.

Without the bubble, the effect looks a little different. I retrofitted this effect to a level I threw together to test SMAA T2X. This is rendered directly out of Unreal via Sequencer.
Shader Setup
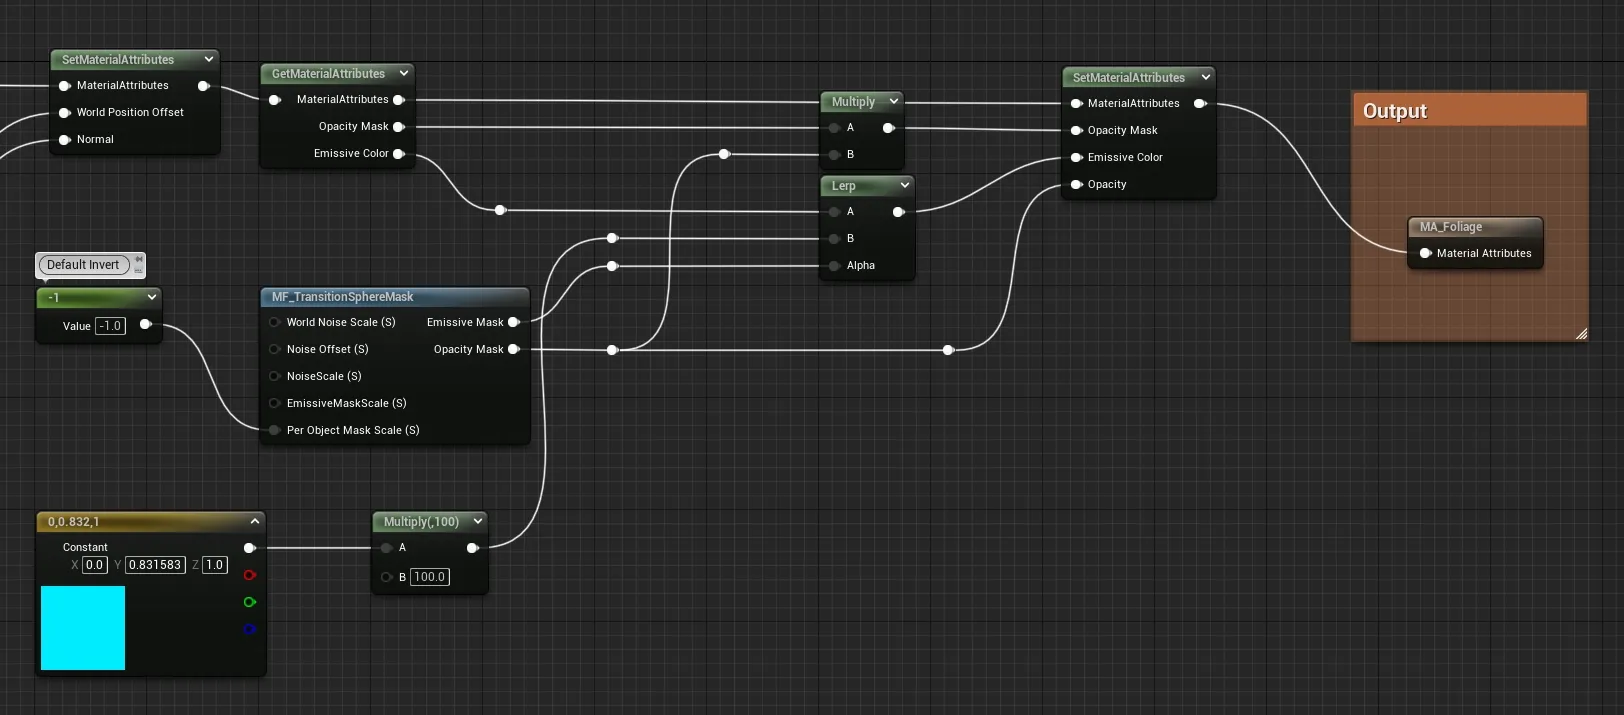
Firstly, we're going to work on a material function that creates two masks. One mask will drive our masked opacity, and the other will drive our emissive band around the transition.
Given this function does all of the lifting, I'll show how it's used before delving into it. The opacity mask from the function is multiplied by the prior value of opacity mask to maintain the data. This is needed for foliage since the leaves are using opacity masks to begin with and overriding that breaks the effect. The emissive mask is linearly interpolated from the current emissive value to the bright blue highlight so we can blend into the highlight when transition passes over emissives.
Material Function
Here's where the metaphorical rubber hits the road. This function is quite large, so you may want to simply add it to your project.
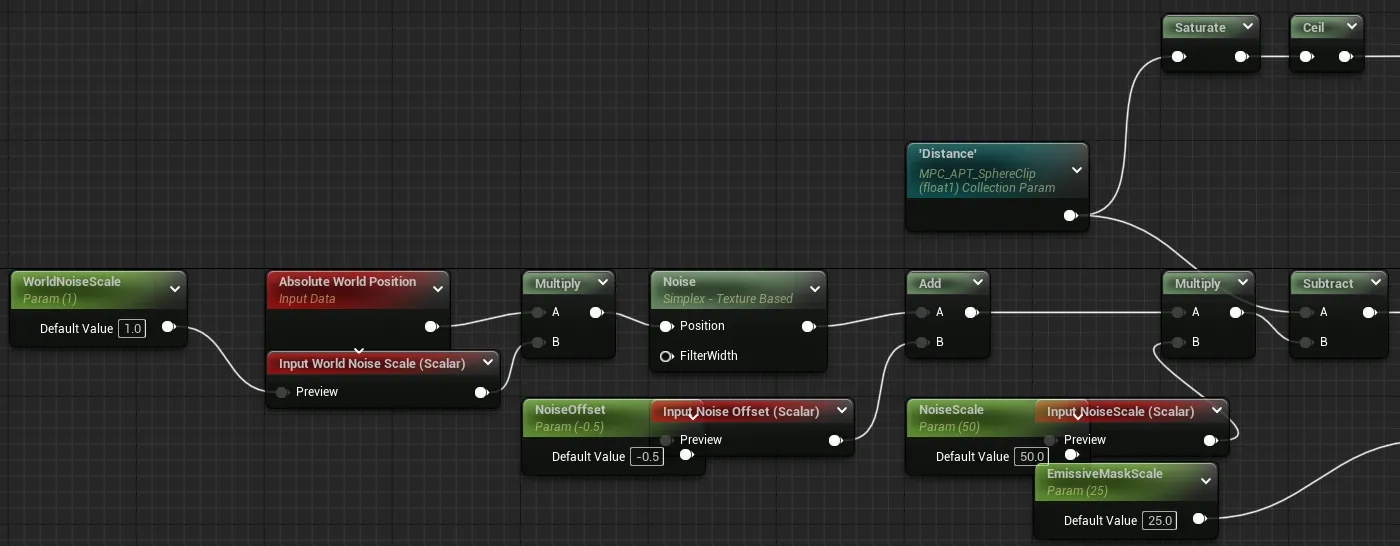
Firstly, we do a bit of pre-processing with our defined values. Unlike Distance and Effect Centre, these are per-shader and are for fixing up the effect if issues arise. These are essentially unmanageable as they are, though, since they cannot be set global. If you wish to use them, I'd make them Material Parameter Collection variables.
The main parts of this stage are to take the world position as an input to the noise node, which gives use a noisy border. The other maths scales the output range to -25cm to 25cm by default. This value is referred to later as Distance Mask.
The upper value that is saturated is used to mask when the distance is very small, otherwise the noise mask will leak slightly.
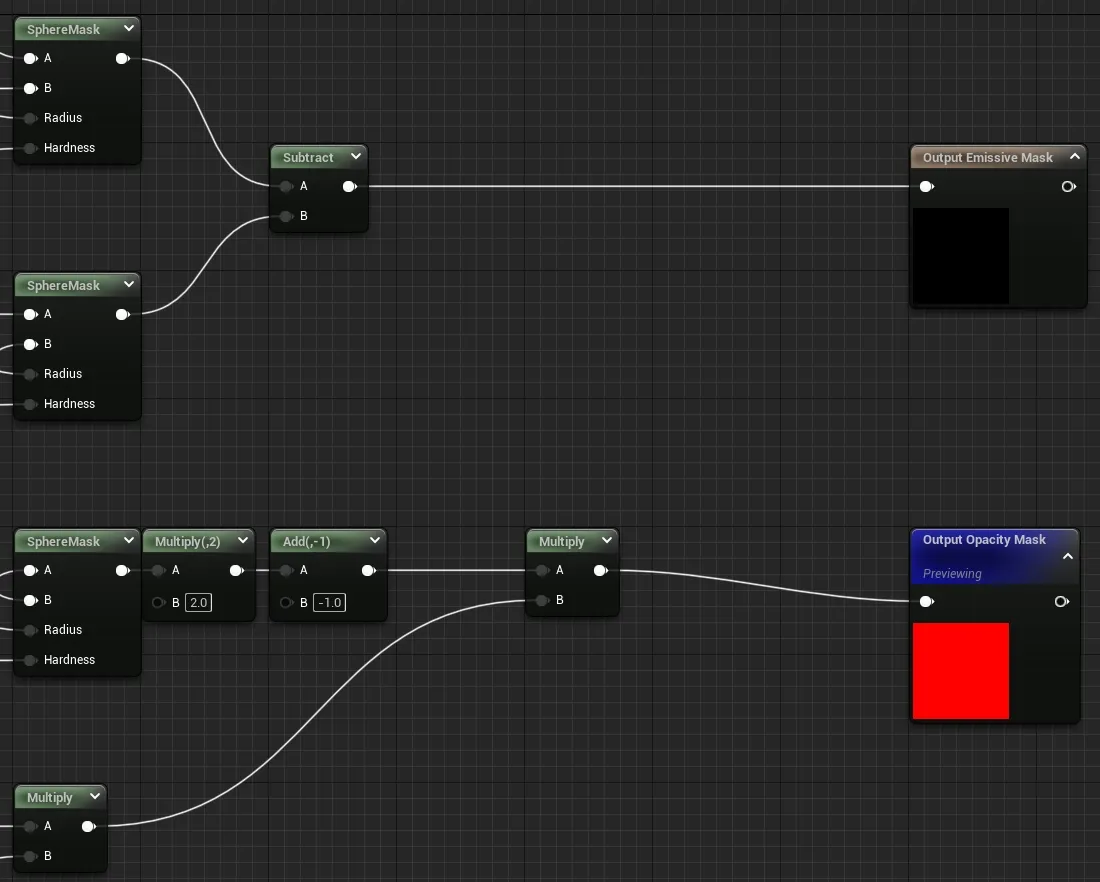
Secondly, we generate the masks. The bottom sphere mask is generating the clip mask. It does so by comparing the world position against the Effect Centre from the Material Parameter Collection with the radius set to the Distance Mask. We then scale that value into the -1 to 1 range because we may need to invert it later.
The logic for the inversion is a little odd, but it works. The PerObjectMaskScale value should be either -1 or 1 and should be set based on whether the object using this material is visible by default. This value is then multiplied by the GlobalEffectScale value in the Material Parameter Collection. The global effect scale allows you to invert the effect globally.
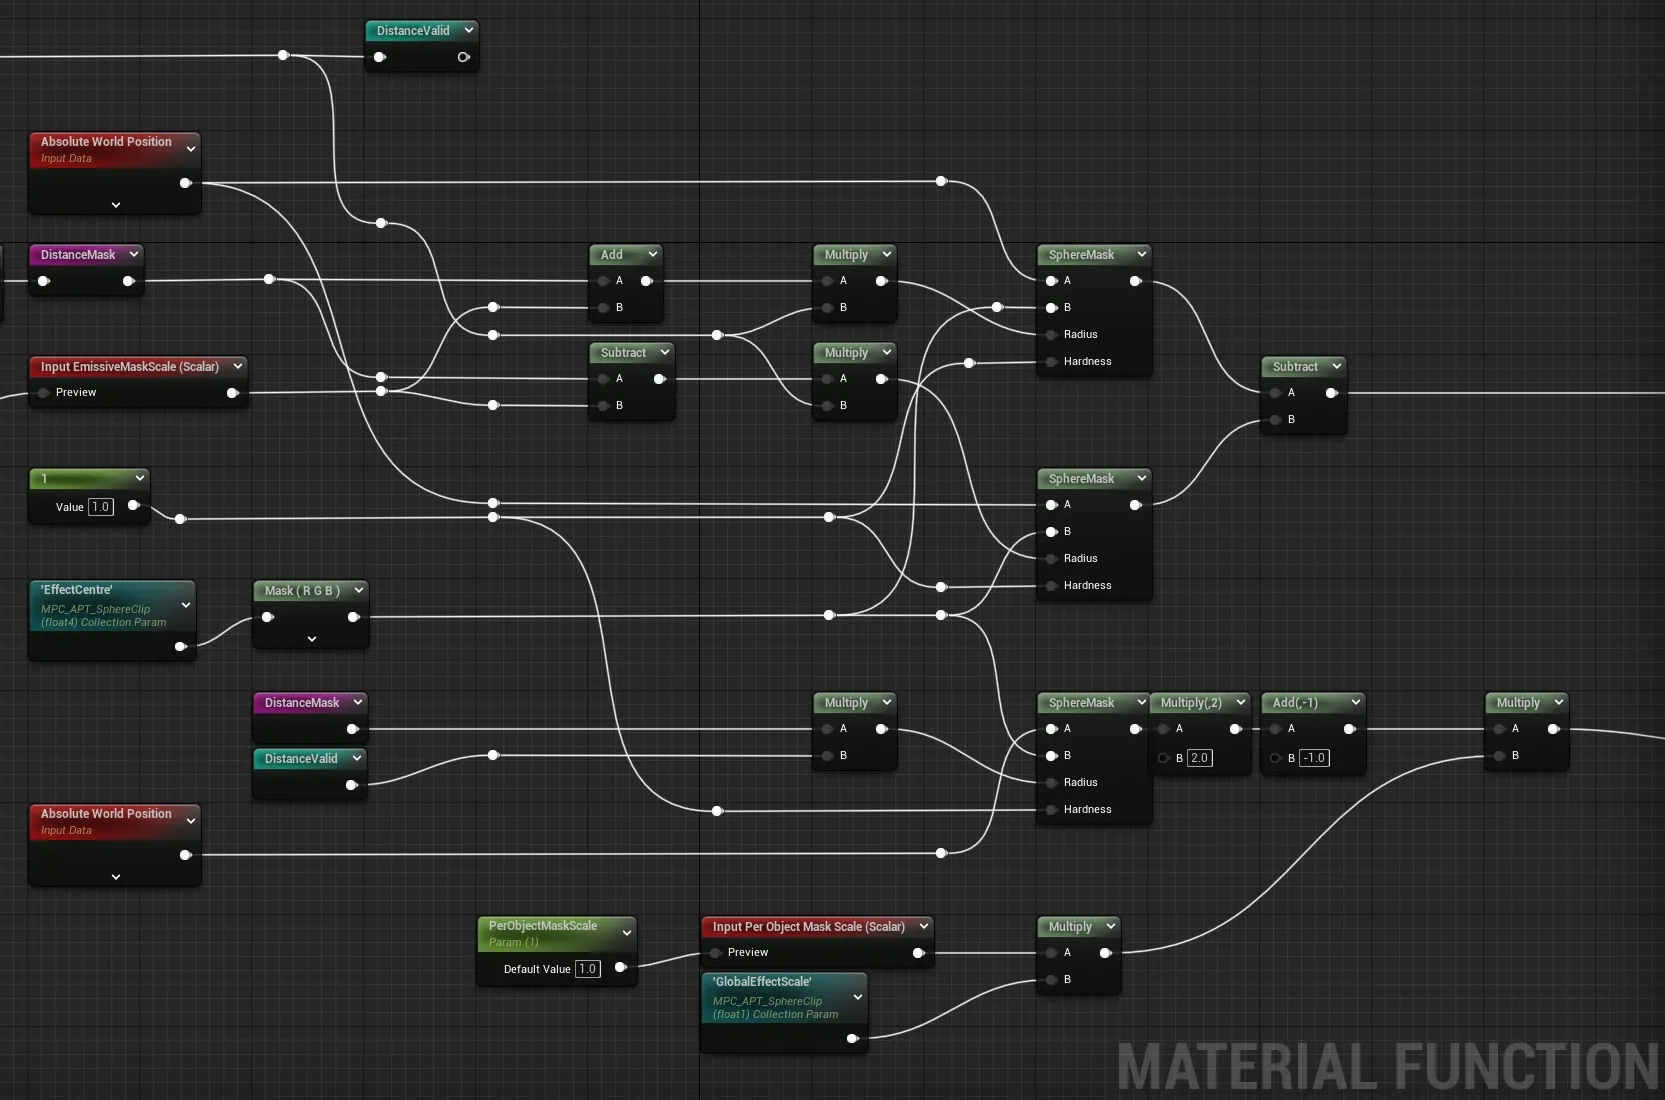
I use this inversion in the video above to reset the state of the effect after it passes the camera so that a second pulse can occur from the origin to "undo" the effect. The second pulse isn't actually undoing anything; it's applying the same effect but with the mask inverted.
The upper two sphere masks are used by the emissive mask and differ only in the distance at which they activate. By offsetting the radius by the emissive scale, we get two masks: one that starts a few units before the clip and one that starts a few units after. We then subtract one from the other to get the area between the two masks. It is this area that we light up with an emissive.
Other Uses for Sphere Mask
Sphere mask is an extremely versatile tool. The two examples show it being used in other places. The first has the sphere mask based against the camera position, which allows us to create this ephemeral space.
The second uses a sphere mask to compute what part of each strand of hair should be emissive. Specifically, the mask is using the hair's UV against a fraction of time to create a looping pulse.