Fun with Tech Art – Pt. 2
We've been cruel to our characters. Now, let's give them the world's softest carpet.


In the previous post, I made a water shader that turned our characters into bona fide submarines. Now, we give them their greatest desire: plush carpets.
Maybe it's the lack of sanity, maybe the lack of sleep, maybe carpets really do have irresistible lustre. We'll never understand what goes on in the heads of our character friends.
So, how does this effect differ from the water shader, and how do we make it?
World-Space Shader
Unlike the water shader, which was object-space, this effect is occurring in world-space. This change only affects the accumulation stage material and not the initial scene capture material.
First Stage
That said, the scene capture material is acting on the player model without unwrapping the player. This shader is outputting only the modified world position.
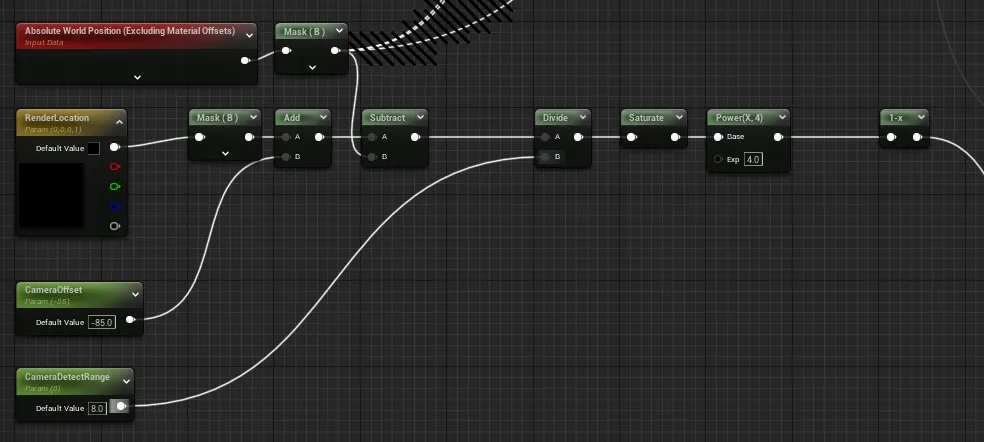
You can safely ignore the off-screen portion; it was only for debugging. We only care about our Z axis for this shader, so we input the player location and mask the blue channel. We could also drag the blue channel from the parameter.
The player location is offset from the ground by half of the height of the capsule. For the default mannequin, this is 90cm. The camera is actually set to -70 relative to this, but I've used -85 as it helps clean things up a bit. You could also move the camera, which is probably better.
We compute the offset from the bottom of the capsule before we divide by our range by the CameraDetectRange variable.
Second Stage
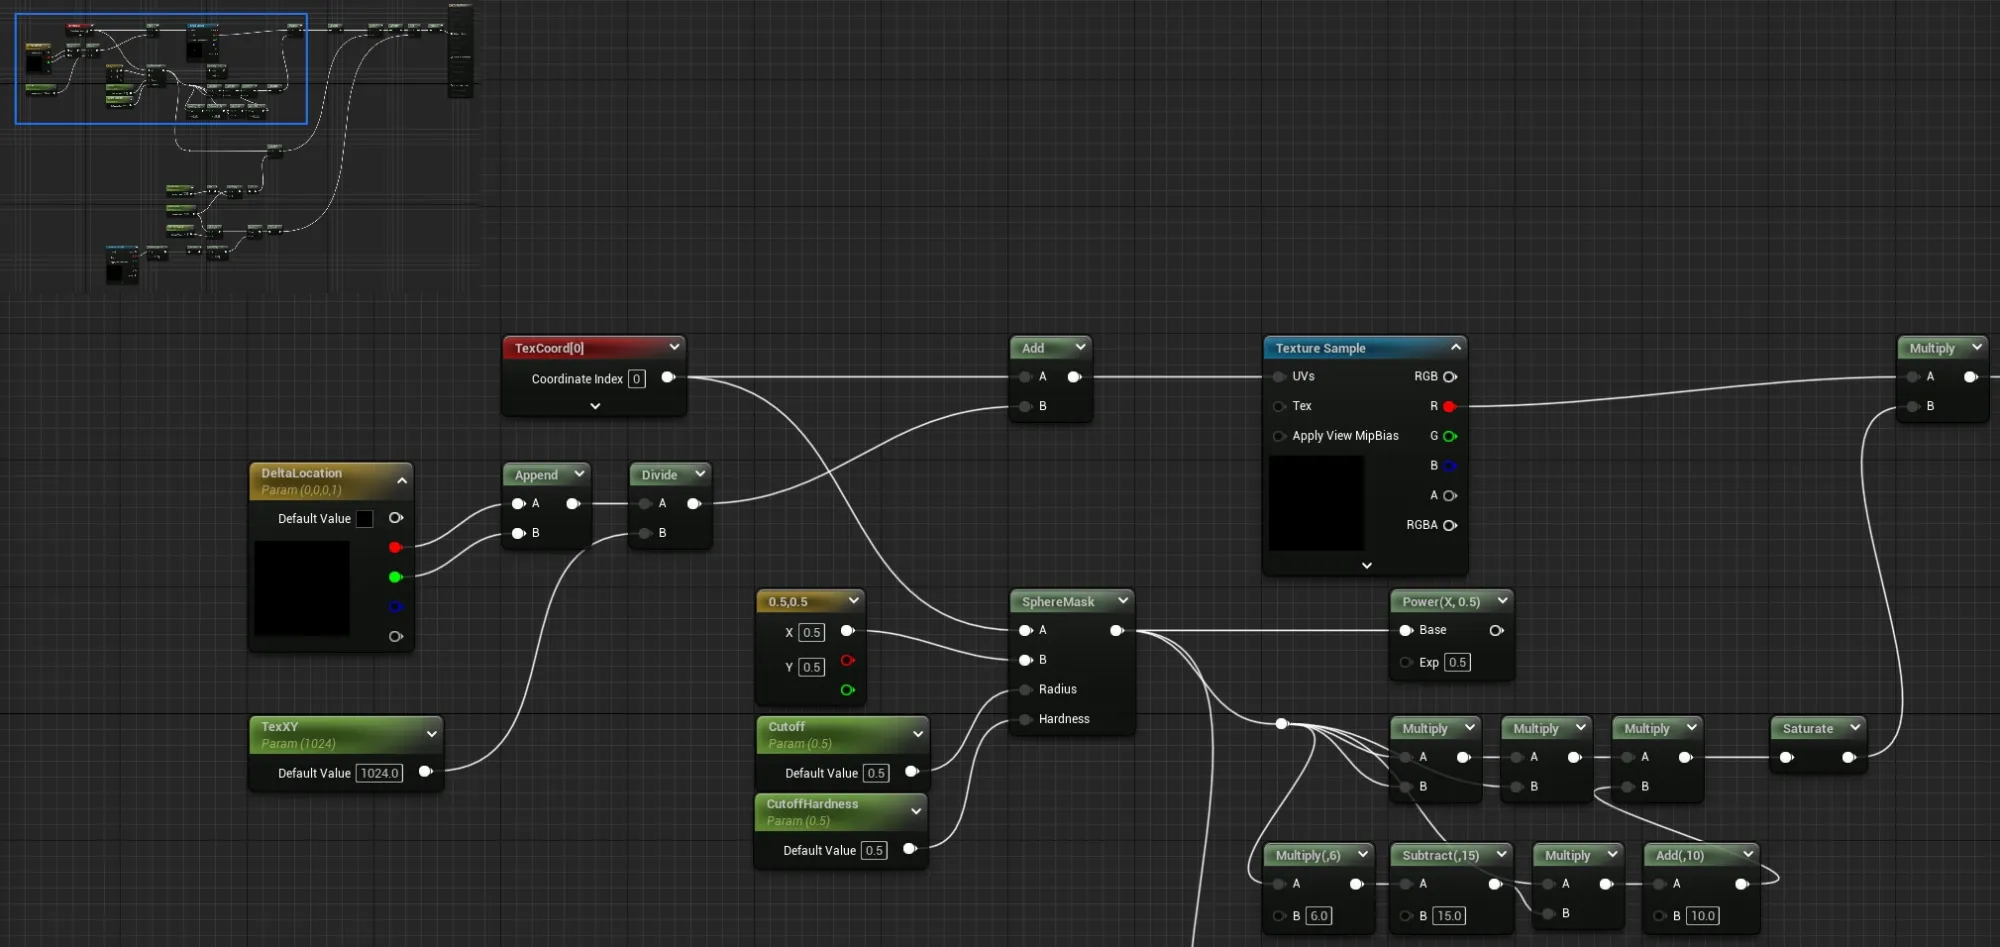
The second stage shader is the that we really need to modify. This time we need to correct for the change in position of the character. The pixels that we accumulated last frame will not align with the pixels recorded in subsequent frame in the player is in motion. This is, in essence, temporal reprojection. The complete shader is shown below.
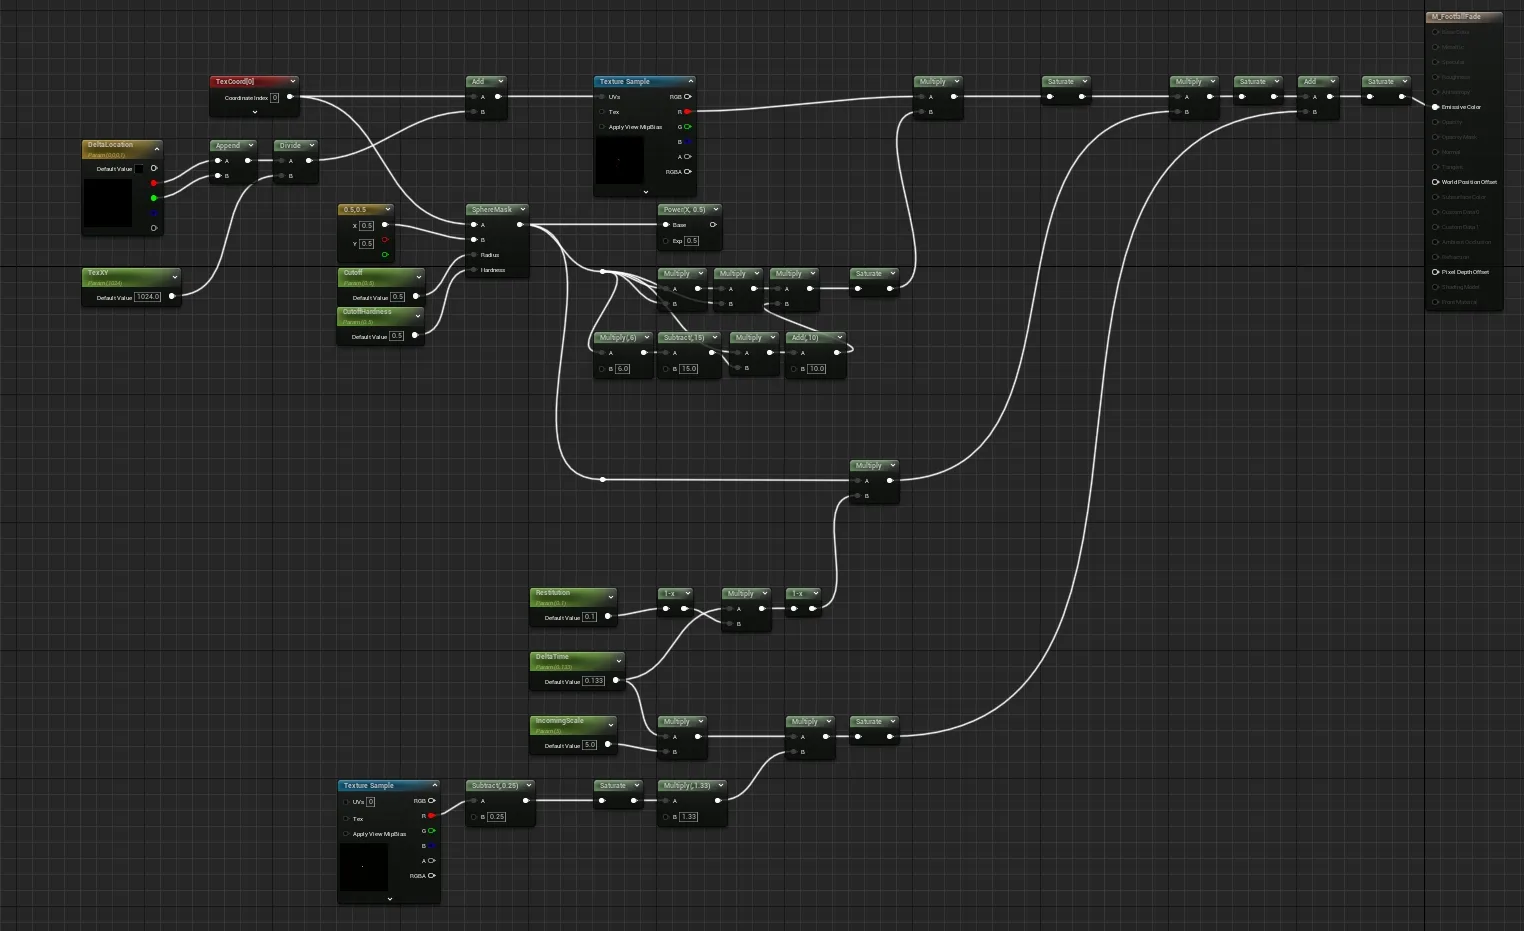
In this portion of the shader, we take the X and Y channel of the change in player location, divide this by the render target size, and add it to the buffers texture coordinates. This reprojects the accumulated effect into the same space as the incoming frame data.
We also take the texture coordinates and use a sphere mask to blur the edges of the effect. The alternative is to allow the effect to clip at the edge of the texture, which looks pretty jarring. This sphere mask is fed into a collection of nodes that implement a smoothstep that is more aggressive than Unreal's smoothstep.
The mask then masks the accumulated buffer to implement a falloff towards the extremes of the texture.
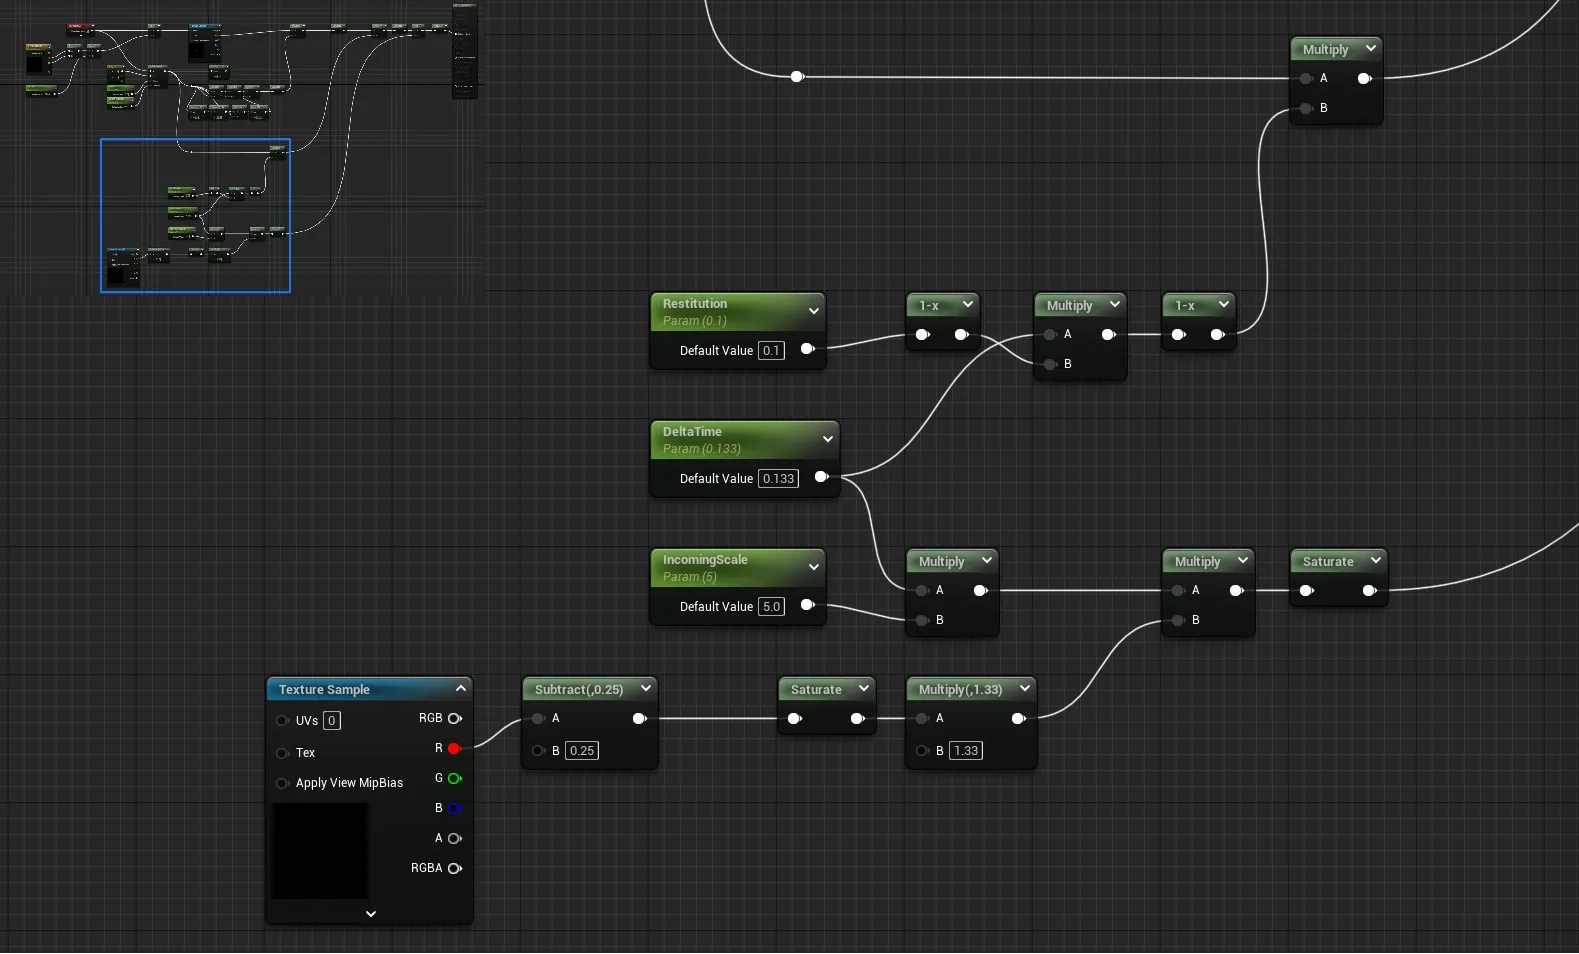
The lower portion of the shader in this image is similar to the water shader. We are taking the values from the current frame, doing a hardcoded threshold, then scaling the input by a scalar and by the amount of time that has passed since the last frame.
At the top of the image, we are taking the sphere mask and performing the same scaling. This value is used to slowly fade the effect over time.
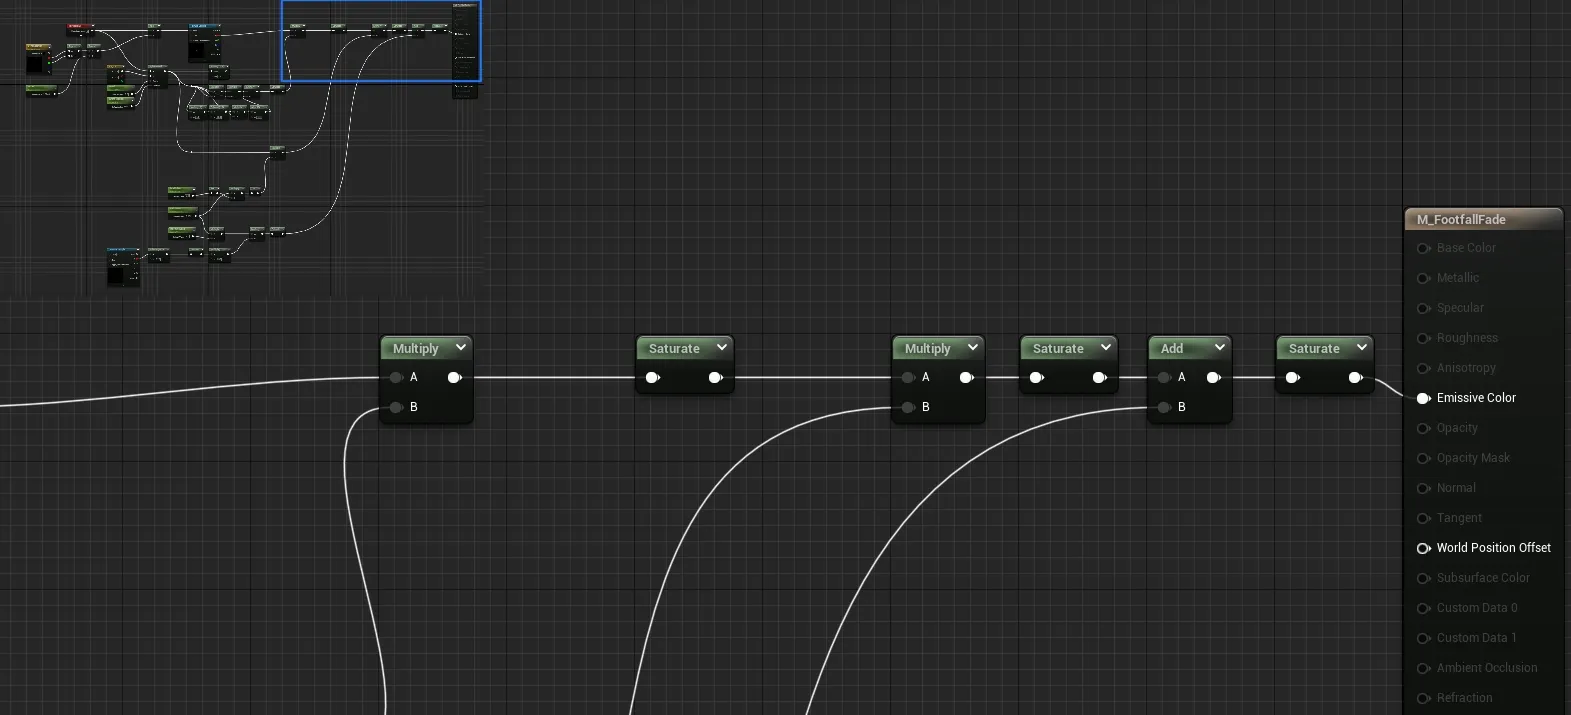
Finally, we get to the output. The multiply node is covered by the reprojection step and is where the falloff is handled, and we saturate that output to make it safe. The second multiply implements the falloff over time, and the add combines the new, incoming data.
Usage
The effect is now complete, but using it isn't quite as simple as the water shader. We need to project the effect correctly onto the ground.
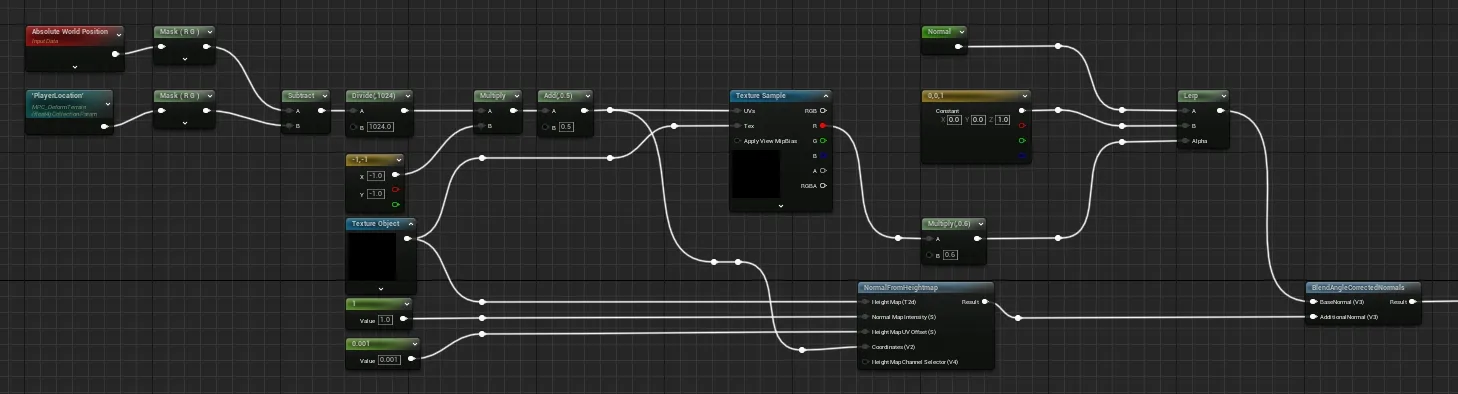
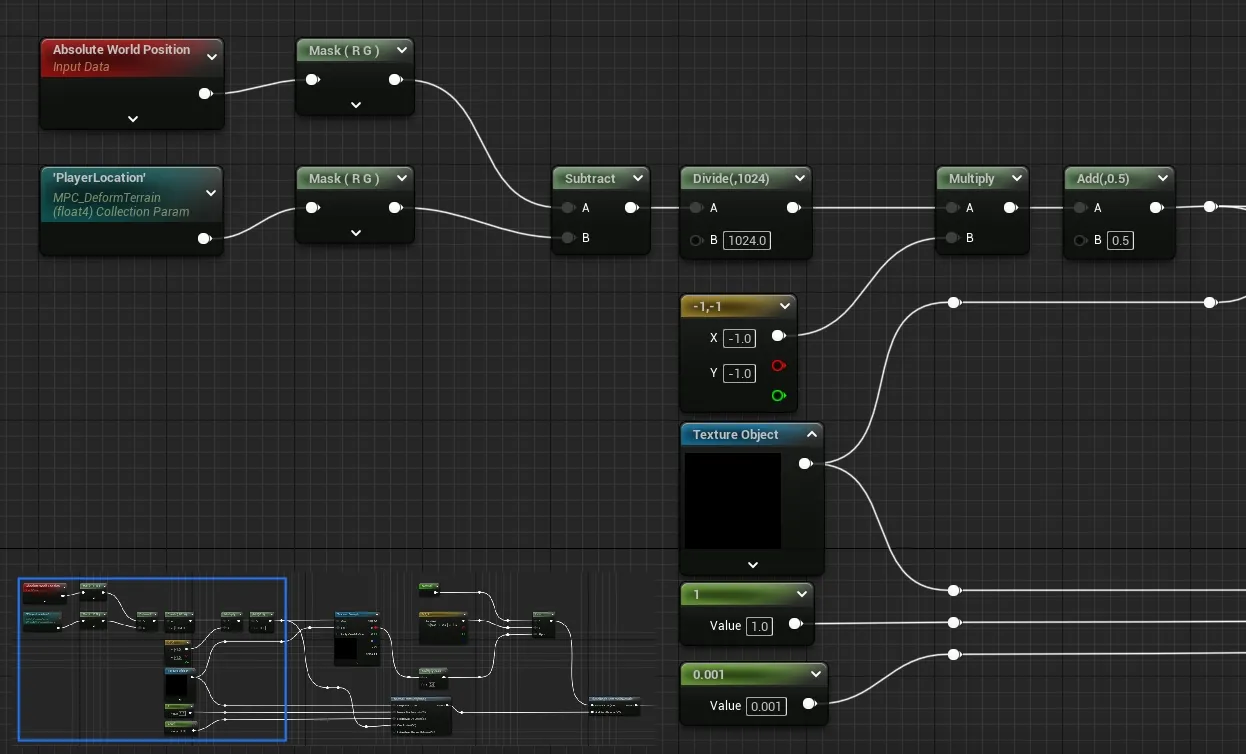
The first step in using the effect is to recentre the effect on the player. We've used a material parameter collection to store the player location. We could have used this in the accumulation shader too.
We subtract the location from the world position to get our recentred XY, then we divide by the texture size to get back to the -1 to 1 range. We don't end up with values that stop at -1 nor 1, so we sample with a clamp rather than a wrap.
In this setup, we also need to invert both the U and V channel, otherwise the effect gets flipped. We'll use this value later as a UV after adding 0.5 to centre it.
The texture object is our accumulated buffer, which is cleared in this image, so it's showing as all zeros here. The other values are used by the NormalFromHeightmap function.
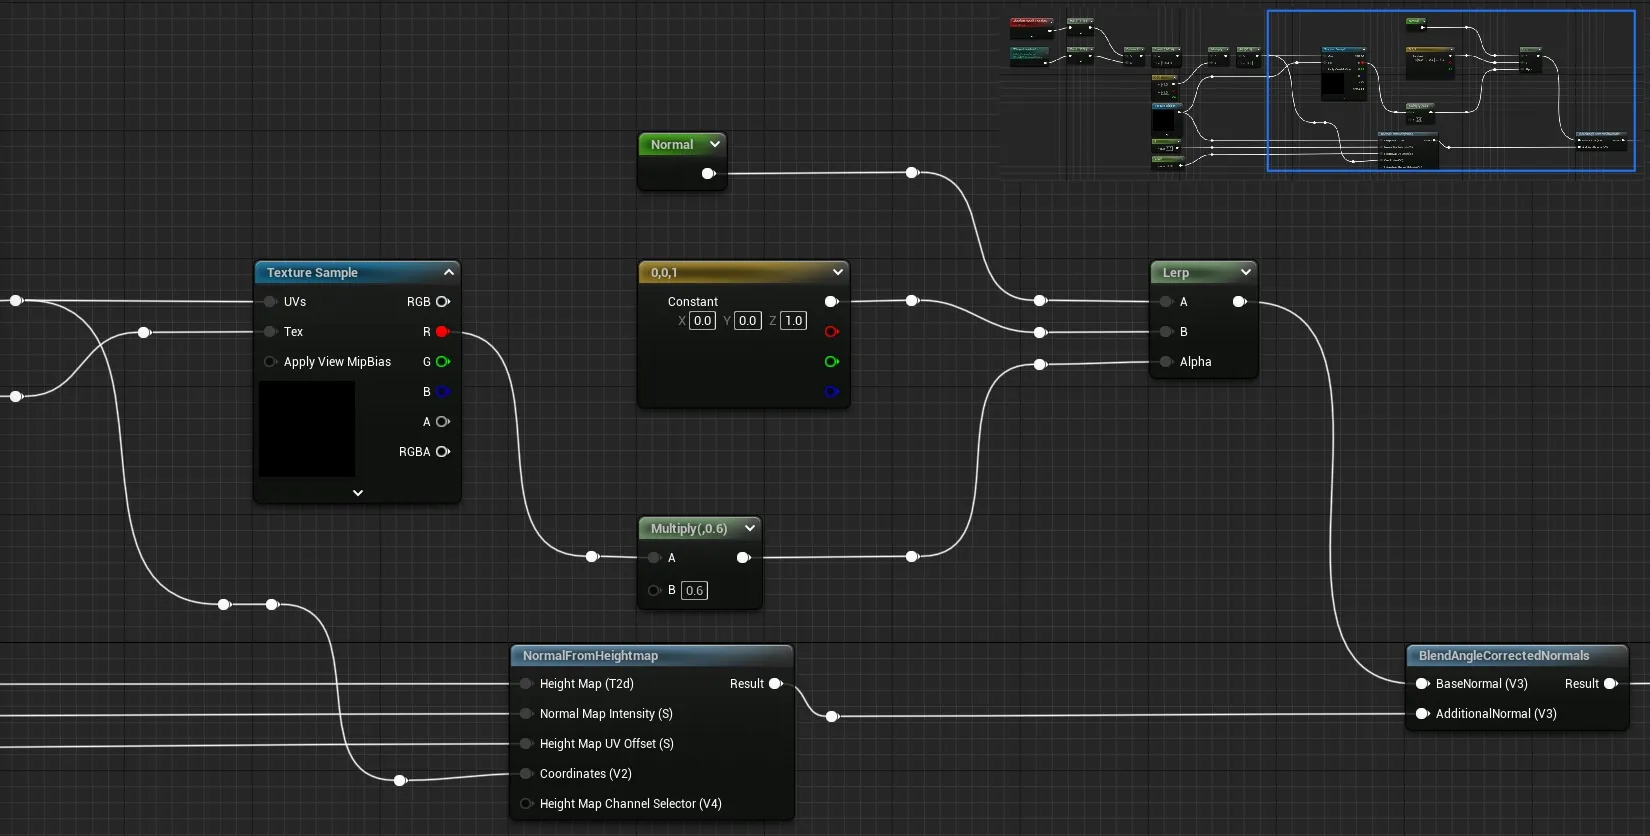
We read our texture object in two places: our texture sampler for interpolating the normal, and the NormalFromHeightmap function that provides a new normal.
The sampler is used to suppress the impact of the underlying normal from the original material inside the footfall, and the heightmap normal supplies the outline around the footfall.