Fun with Tech Art – Pt. 1
Join me as I create some tech art in Unreal. In this post, we look at shader that lets us submerge, or dunk, our characters into water.

I started this mini project as I wanted to have environment effects apply to the player character when they became submersed.
There're a few requirements that I'm going to list upfront as they're a bit dry.
- The mesh must have non-overlapping UVs
- 2x Render Targets
Let's break these down. The mesh can't have overlapping UVs as it breaks the effect. That said, the UVs don't have to be the primary UV set, and I'd suggest you place them as an alternate. Also, note that static meshes have a button to generate non-overlapping UVs for lighting bakes, and I'm piggybacking on that function, hence the two actors being static mesh.
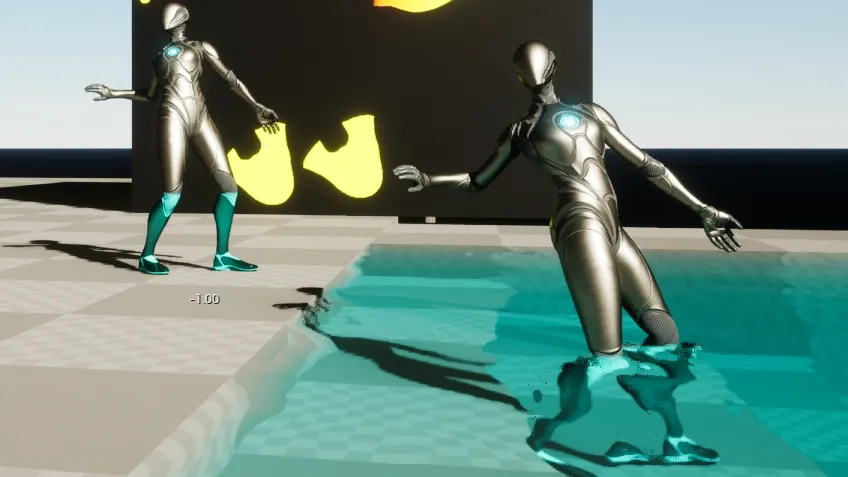
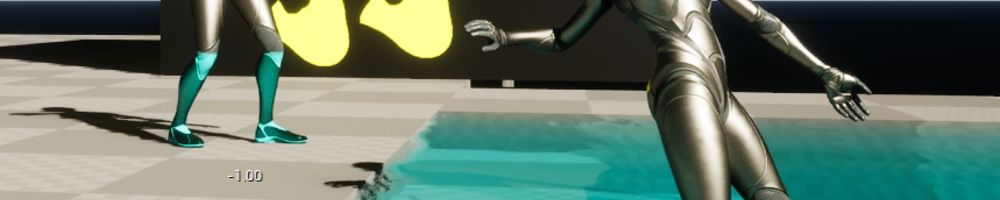
The left mannequin is only showing the result of the effect, and the mannequin on the right is driving the effect. In the background, there is an example of the two render targets used in the effect. And that gives a bit of a hint as to how this is achieved.
To start, let's conceptualise what we need. Ultimately, we want a texture that tells us where to apply water, or in this case, make blue. The texture must adhere to the UVs of the character to which we are applying this effect, but we also need to know if the waves are hitting us in world space. We're going to cheat on the last one and assume that the water height is zero.
We have a trick up our sleeve for making the texture in real time though. The mesh already has the UVs we need, and we're going to just use them. We do this by creating an unwrap shader. This shader flattens the vertices of the mesh into the XZ plane. By pointing a scene capture component down at this plane, we can capture an image that aligns with these UVs.
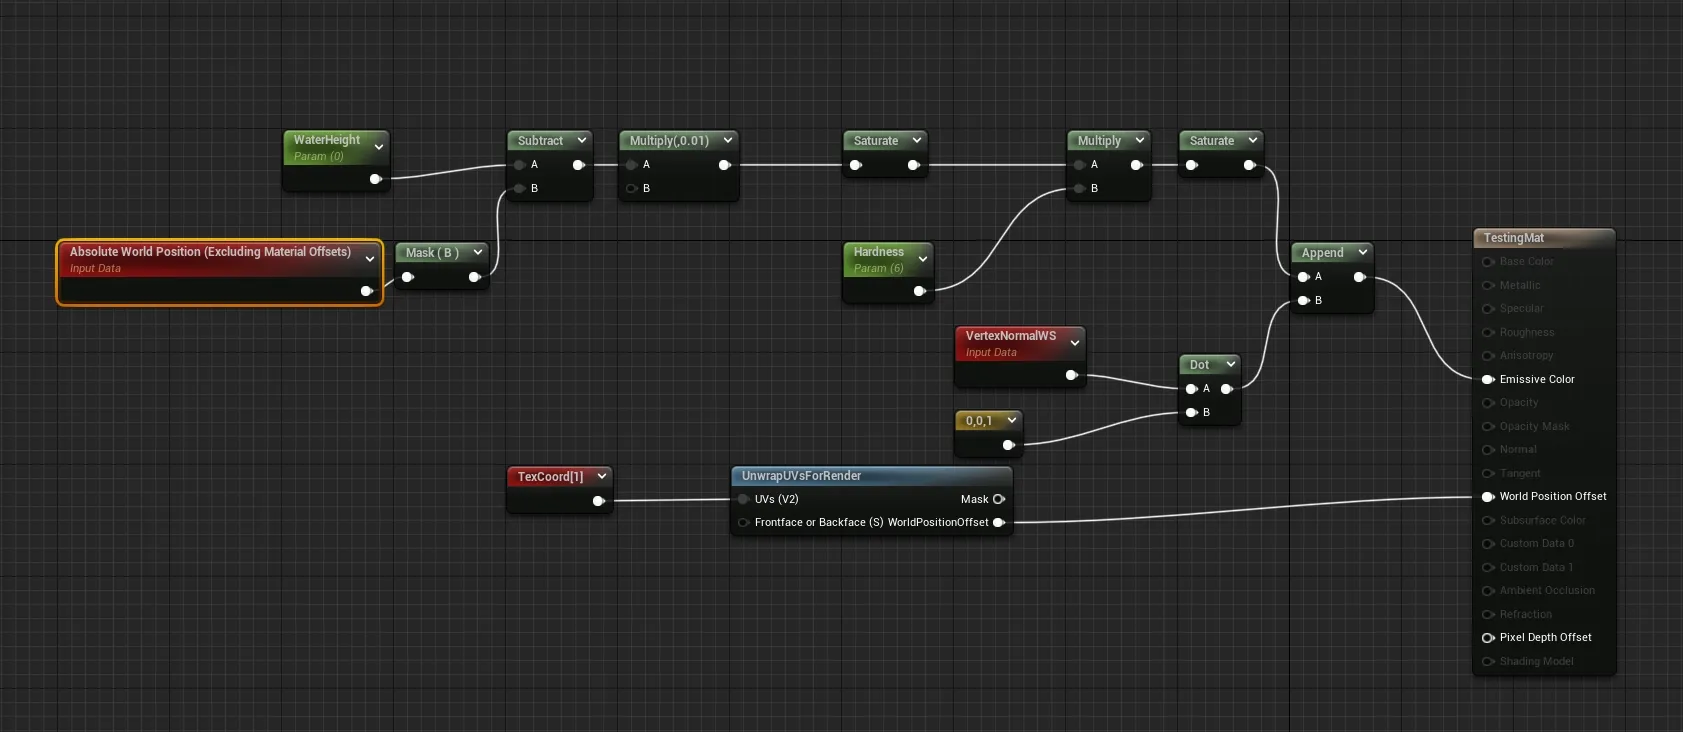
What we capture is the pixel shader portion of the unwrap shader. This shader should be emissive for a few reasons:
- It's a performance saver. We don't need anything else.
- We can output values outside the normal range if we need them.
The emissive part of the shader is simply outputting a value when the world-space position of the fragment would have been under the water height without the unwrap. That is to say, if the unwrap wouldn't have occurred, would the pixel have been under the water.
The scene component can now render the mesh with the unwrap shader into a render target. This render target is the first of a pair and exists to store the current frame's worth of information. For this particular effect, merging these two targets may be possible, but for ease of understanding, I've kept them split.
The second render target can be thought of as a memory. Its job is to store the accumulated amount of water between frames. This allows our player to leave the water and remain wet.
Moving data from the first render target to the second is done in blueprint, so let's jump into that before we get to the shader that does the update.

There's a bit of setup ignored here, and that's setting the player's materials to the unwrap material before we get to SetWorldRotation call. After orienting the camera (which doesn't need to be done on tick, I just wanted it in the image), we capture the scene from our capture component. I've set the scene capture to only capture the player, so that's all we render to the first render target. That render target is set in the scene capture components settings, and not in the blueprint graph.
I then set the delta time in the shader. I use this to drive the decay over time so that it's less framerate dependant. Then we get to where the rubber hits the road: Draw Material to Render Target. This function draws that memory render target to itself by invoking the "Water Fader" shader.
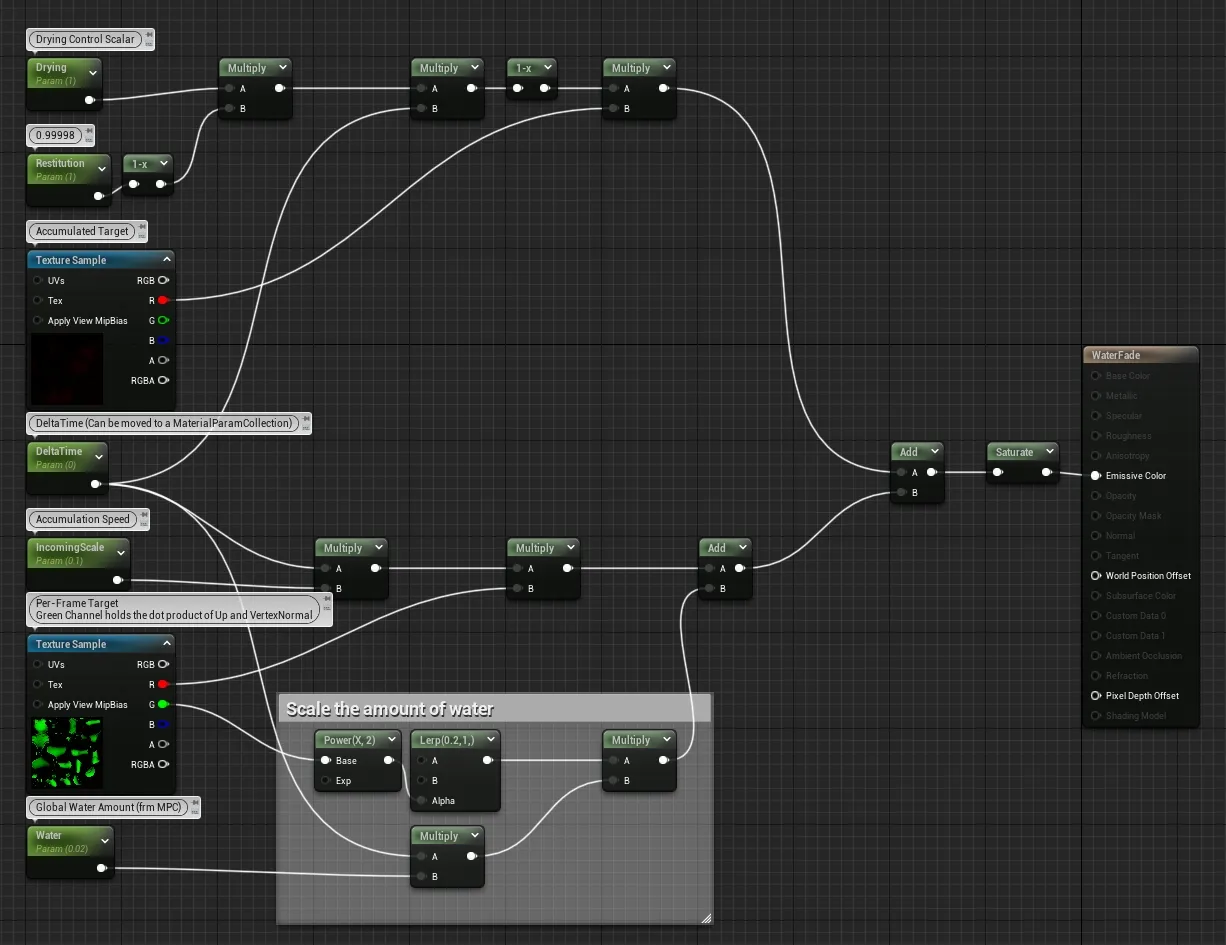
Speaking of the Water Fader Shader, let's break that down. This shader has two main parts as you can see by the add node on the far right. The top half of this graph is handling the accumulation update, and the bottom is handling adding the current frames data to our "memory" texture.
The upper region starts by messing with two constants that control the rate of decay. The rate is split in two like this because I was doing some else previously and never updated it. From there, the control is multiplied by DeltaTime to make this operation time invariant. We wouldn't want differing frame rates to affect the rate of decay for our effect. Lastly, we multiply that new number by the same render target we are writing out to, which in turn, cases it to slowly fade.
The lower region handles injecting the current frame data into the memory target. We do this by once again multiplying by DeltaTime and our input texture. You can safely ignore the bit with the green channel that gets added. All this is doing is using the Upwardness mask in the green channel to apply uniform wetness to the character to simulate rainfall. That mask is the dot product of the vector 0,0,1 and the vertex normal.
When put together with some rain effects, we get a proof of concept.
Niagara Integration
Niagara supports spawning from a texture mask, and this includes render targets. Using the accumulated mask for the water effect, we can opt to spawn droplet particles from the wet areas of the mesh.
Taking this idea a step further, we can do a bit of computation on the emitter itself to prevent droplets spawning from the upward facing portions of the mesh. A dot product does this nicely, and it has the added benefit of concentrating droplets on down-facing portions when used as a spawn chance.
To complete this effect, at the cost of a second texture lookup, the first water mask can be sampled in its inverse to prevent droplets spawning on underwater portions of the mesh.
Now, you may wonder where we can go from here, or maybe you're inspired to make some else. A just one more thing. For me, that was sudden and irresistible urge to create the world's softest video game carpet. In part two of this foray into tech art.
Who am I kidding? I'm mercurial in the ways of tech art, and there's no way I'm stopping at only two. Though the rest may need to wait until I've either built a character that needs something custom or until I bite the morphological bullet and make some master materials.