PCG Assembly Script in Unreal 5.2
The Procedural Content Generation (PCG) framework is experimental in Unreal 5.2 and using Packed Level Actors assemblies isn't well-documented.

Unreal 5.2 has launched, and with it comes a host of new features. Chief among them: the Procedural Content Generation (PCG) Framework. It's a powerful system, and Epic has a script to allow us to work with Packed Level Actors (PLAs).
Now before I go further, work with doesn't mean use Packed Level Actors as static meshes. It means use the data from a PLA as a list of points, meshes, and textures to spawn. The distinction is that we effectively break the PLA down to its parts but gain procedural control over those parts.
A better example can be found in the video below:
Setting this up isn't well documented, so I thought I would create a list of steps to get the Packed Level Actor data into the PCG Graph.
Readying the PCG Data
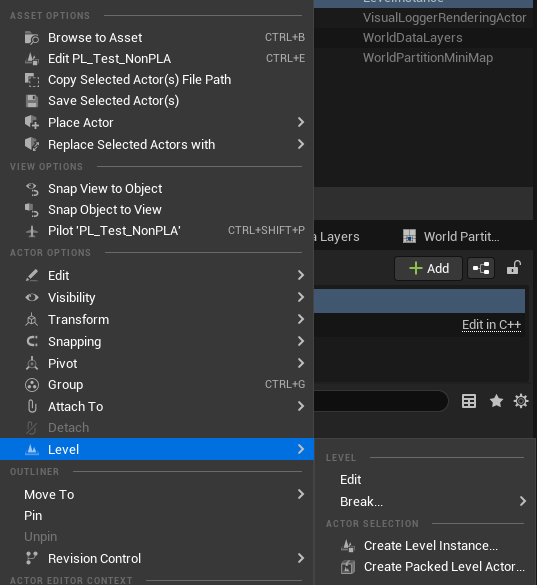
Firstly, create a PLA. If you haven't done this before, the easiest way is to select the assets you wish to turn into a combined PLA and right-click, select Level, and click Created Packed Level Actor. The screenshot below illustrates where in the menu this is. As an aside, the asset I'm using is a LevelInstance rather than a PLA, but both seem to work.
Secondly, browse to the Level asset of the PLA. This is normally the PLAs name and is found beside the BPP_<Name> asset. If you are using LevelInstances, the latter asset won't exist, it will only be the Level asset that you are instancing.
Right-click this asset, select Scripted Actions, and click PCG - Level to PCG Settings. This action executes a script found at Engine/Plugins/Experimental/PCG/Content/Utilities/PCGUtility_LevelToPCG.uasset. This should show up by default with the plugin enabled, but you may need to browse to the script and execute it once manually.
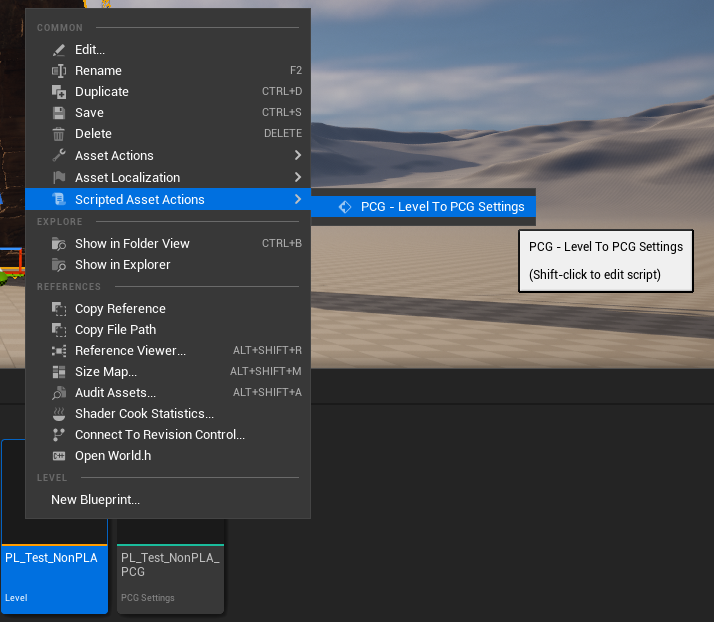
The script generates a PCG Settings file named <LevelName>_PCG. This file is the asset that the PCG Graph will accept.
PCG Graph
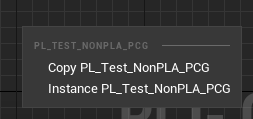
I could be wrong about this, but the only method I found of adding this data to the PCG Graph was to drag the PCG Settings file into the graph. Doing so will summon a small menu asking if the data should be copied or instanced. I chose instanced as that appears to be what Epic used in the Youtube video.
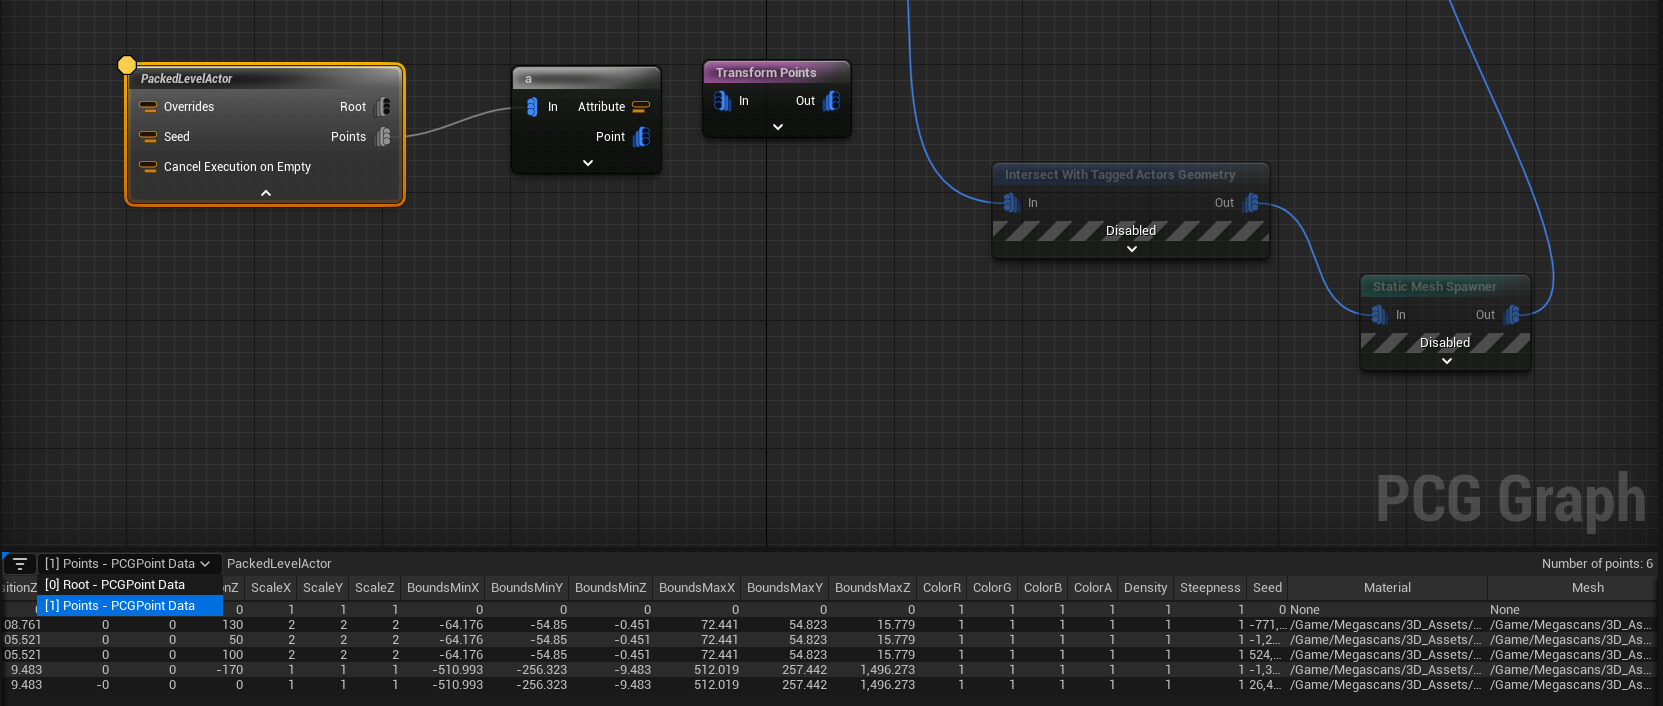
If you wish to see what data is provided by the Root and Points pins, you will need an active PCG Volume with this PCG Graph bound to it. You will also need to set the debug object to the active PCG Volume; otherwise, inspecting the node will give you an empty return.

After the debug object is set, pressing a on the node – or right-click, inspect – will show the data available from the node. Do be aware that there are two pins, so there are two entries in the dropdown menu in the inspector window.
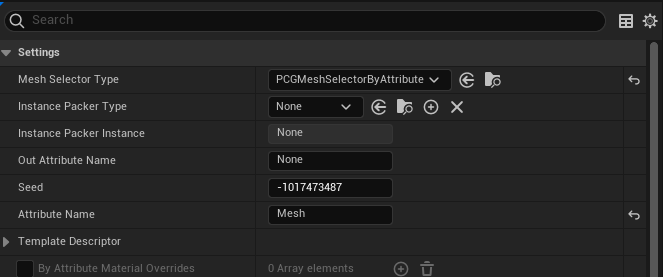
To draw these points, the static mesh spawner needs to be configured slightly differently from the defaults. Since we are passing in our mesh, we need to tell the spawner to select the mesh from the point attributes using the PCGMeshSelectorByAttribute Mesh Selector. The attribute we select as the static mesh with be Mesh.
Now, we're ready to make something. So, grab a Point Sampler node, a Copy Points node, and a Transform Points node, wire them up, and see what happens! Our point sampler is going to generate points on the landscape. For each of these points, we're going to copy the points generated from the PLA, which essentially duplicates the PLA.
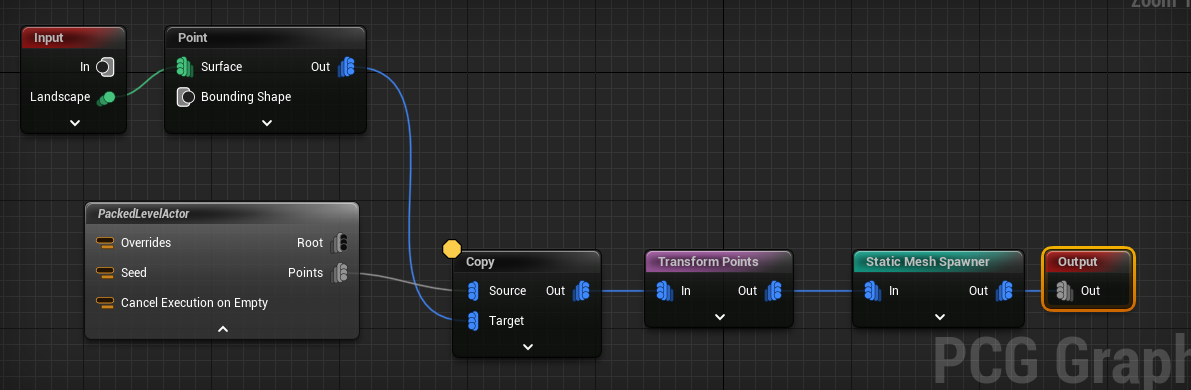
That might not look to appealing, so let's hit it with some random rotations and translations, and we get something more interesting. It's a bit rough around the edges, but it's not too bad for a short amount of work.